Building a custom keyboard can be a fun hobby and makes it possible to create something you want after your specifications. The hardest part of all of this is sourcing the parts. This will heavily depend on the country you are from. Generally the US have a great selection of high quality parts from local vendors. In the EU you’ll mostly resort to importing from china.
Great sources are
- AliExpress - cheap and broad selection, good source for keycap set clones
- KBDFans - great to get started, my first keyboard was just build with kbdfans
- /r/mechmarket - you can find rare or high quality parts on here sometimes
The parts
A short summary of parts you need:
- PCB
- Case
- Plate
- Stabilizers
- Switches
- Keycaps
- USB C Cable
Additional parts/tools that could be used:
- Lube
- Switch films
- Brushes
- Switch opener
- Switch puller
- Keycap puller
- Lubing station
- Tweezers
PCB
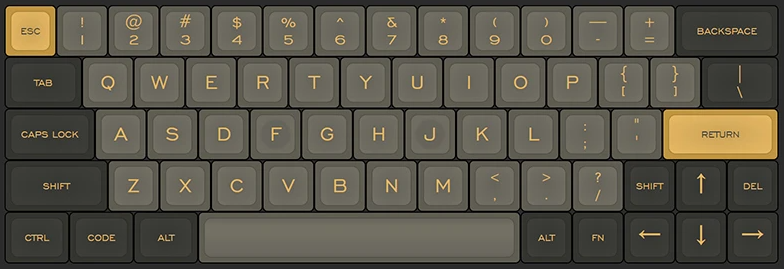
First you’ll have to figure out what layout you want. I went with 60% because I already own a 75% one and I wanted to try something smaller. But I can’t really handle a layout without arrow keys, so I went with a bit more unusual 60% layout, the MelGeek MJ64.
The MelGeek MJ64 supports
- Hot-swap switch sockets
- RGB backlighting
- QMK
Hot swap means you won’t have to do any soldering. The switches just get plugged into the PCB and can get easily removed or swapped with other switches.
Soldering isn’t very hard though and some prefer it even because the switches are more stable and personally I think it’s rather rare needing to swap out your switches. So don’t be afraid to pick a PCB that needs soldering if you have the tools.
RGB backlighting the keys have a little RGB LED that can be controlled via software. There is also RGB underglow which will just have a few leds pointing to the bottom, some cases have transparent parts to give this a nice effect.
QMK is one of the biggest features for me of a custom keyboard and I’ll go into detail about it later, for now just make sure your PCB supports it, though almost all do.
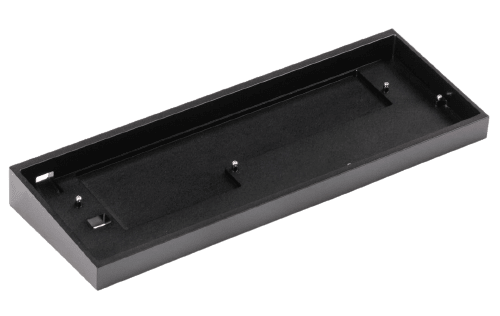
Case
The PCB is only compatible to a select few cases, some cases are so custom they even come with their own custom PCB. My chosen PCB is compatible with all GH60 cases. The material here decides the price point, if you want aluminimum you’ll be paying a lot more than something more simple than plastic. Some Plastic cases can be as low as $12 while a good aluminum case is more like $80.
Just browse AliExpress for GH60 cases to get an idea what kind of materials are available, maybe you’ll also find something on /r/mechmarket with patience.
I chose the TOFU60 case which is compatible with GH60.
Plate
Also compatible with PCB and case the plate must be. Options are aluminimum, brass, plastic or even carbon fiber. Where aluminium is definetely the most common, brass is stiffer and heavier, most don’t like the more stiff feeling. I’ll stick with something simple out of aluminium. Make sure your plate is compatible with the layout you are planning to do.
Stabilizers
Now you need stabilizers. There are plenty options and oppinions on stabilizers out there rule of thumb is prefer screw-in over clip in. I went with GMK screw-in stabilizers, make sure you have enough of them and the right size for your PCB, the PCB description usally says how many stabilizers it needs otherwise just count the long keys you have on your keyboard (2u+). 1u is the size of a normal key like A. Backspace would be an example of a classic 2u key with a stabilizer.
Switches
The part that will change the feel of your board the most are the switches. There are thousands of options out there beyond the basic cherry mx switches. First find out what kind of switch type you want: tactile, clicky or linear.
Tactile
Tactile switches have a little bump at the top to better know when you pressed the key, they are relatively quiet and the most common switch type. Cherry MX Browns are a very common example for tactile switches, although quite hated in the custom keyboard community because mx browns have a relative weak tactile bump compared to other contenders here.
Clicky
Clicky switches also have a very distinct bump at the start of the keystroke, the bump is audible aswell that’s why they are called clicky. You should not bring these to the office because they are most certainly one of the loudest switch types here. Most common example would be the Cherry MX Blues.
Linear
Linear switches have no bump and require the same pressure all the way down. Some love that super smooth feeling. Cherry MX Reds would be one of example for a linear switch.
I used to use Cherry MX Blues for a long time then switched to Cherry MX Browns. I wanted to try something new with this board so I went with something more exotic compared to Cherry, Zealios v2 65g which are tactile switches and apparently a lot more tactile then Cherry MX Browns. Make sure to get enough switches, for my PCB 64 switches would be enough but having backup is always good incase you break some.
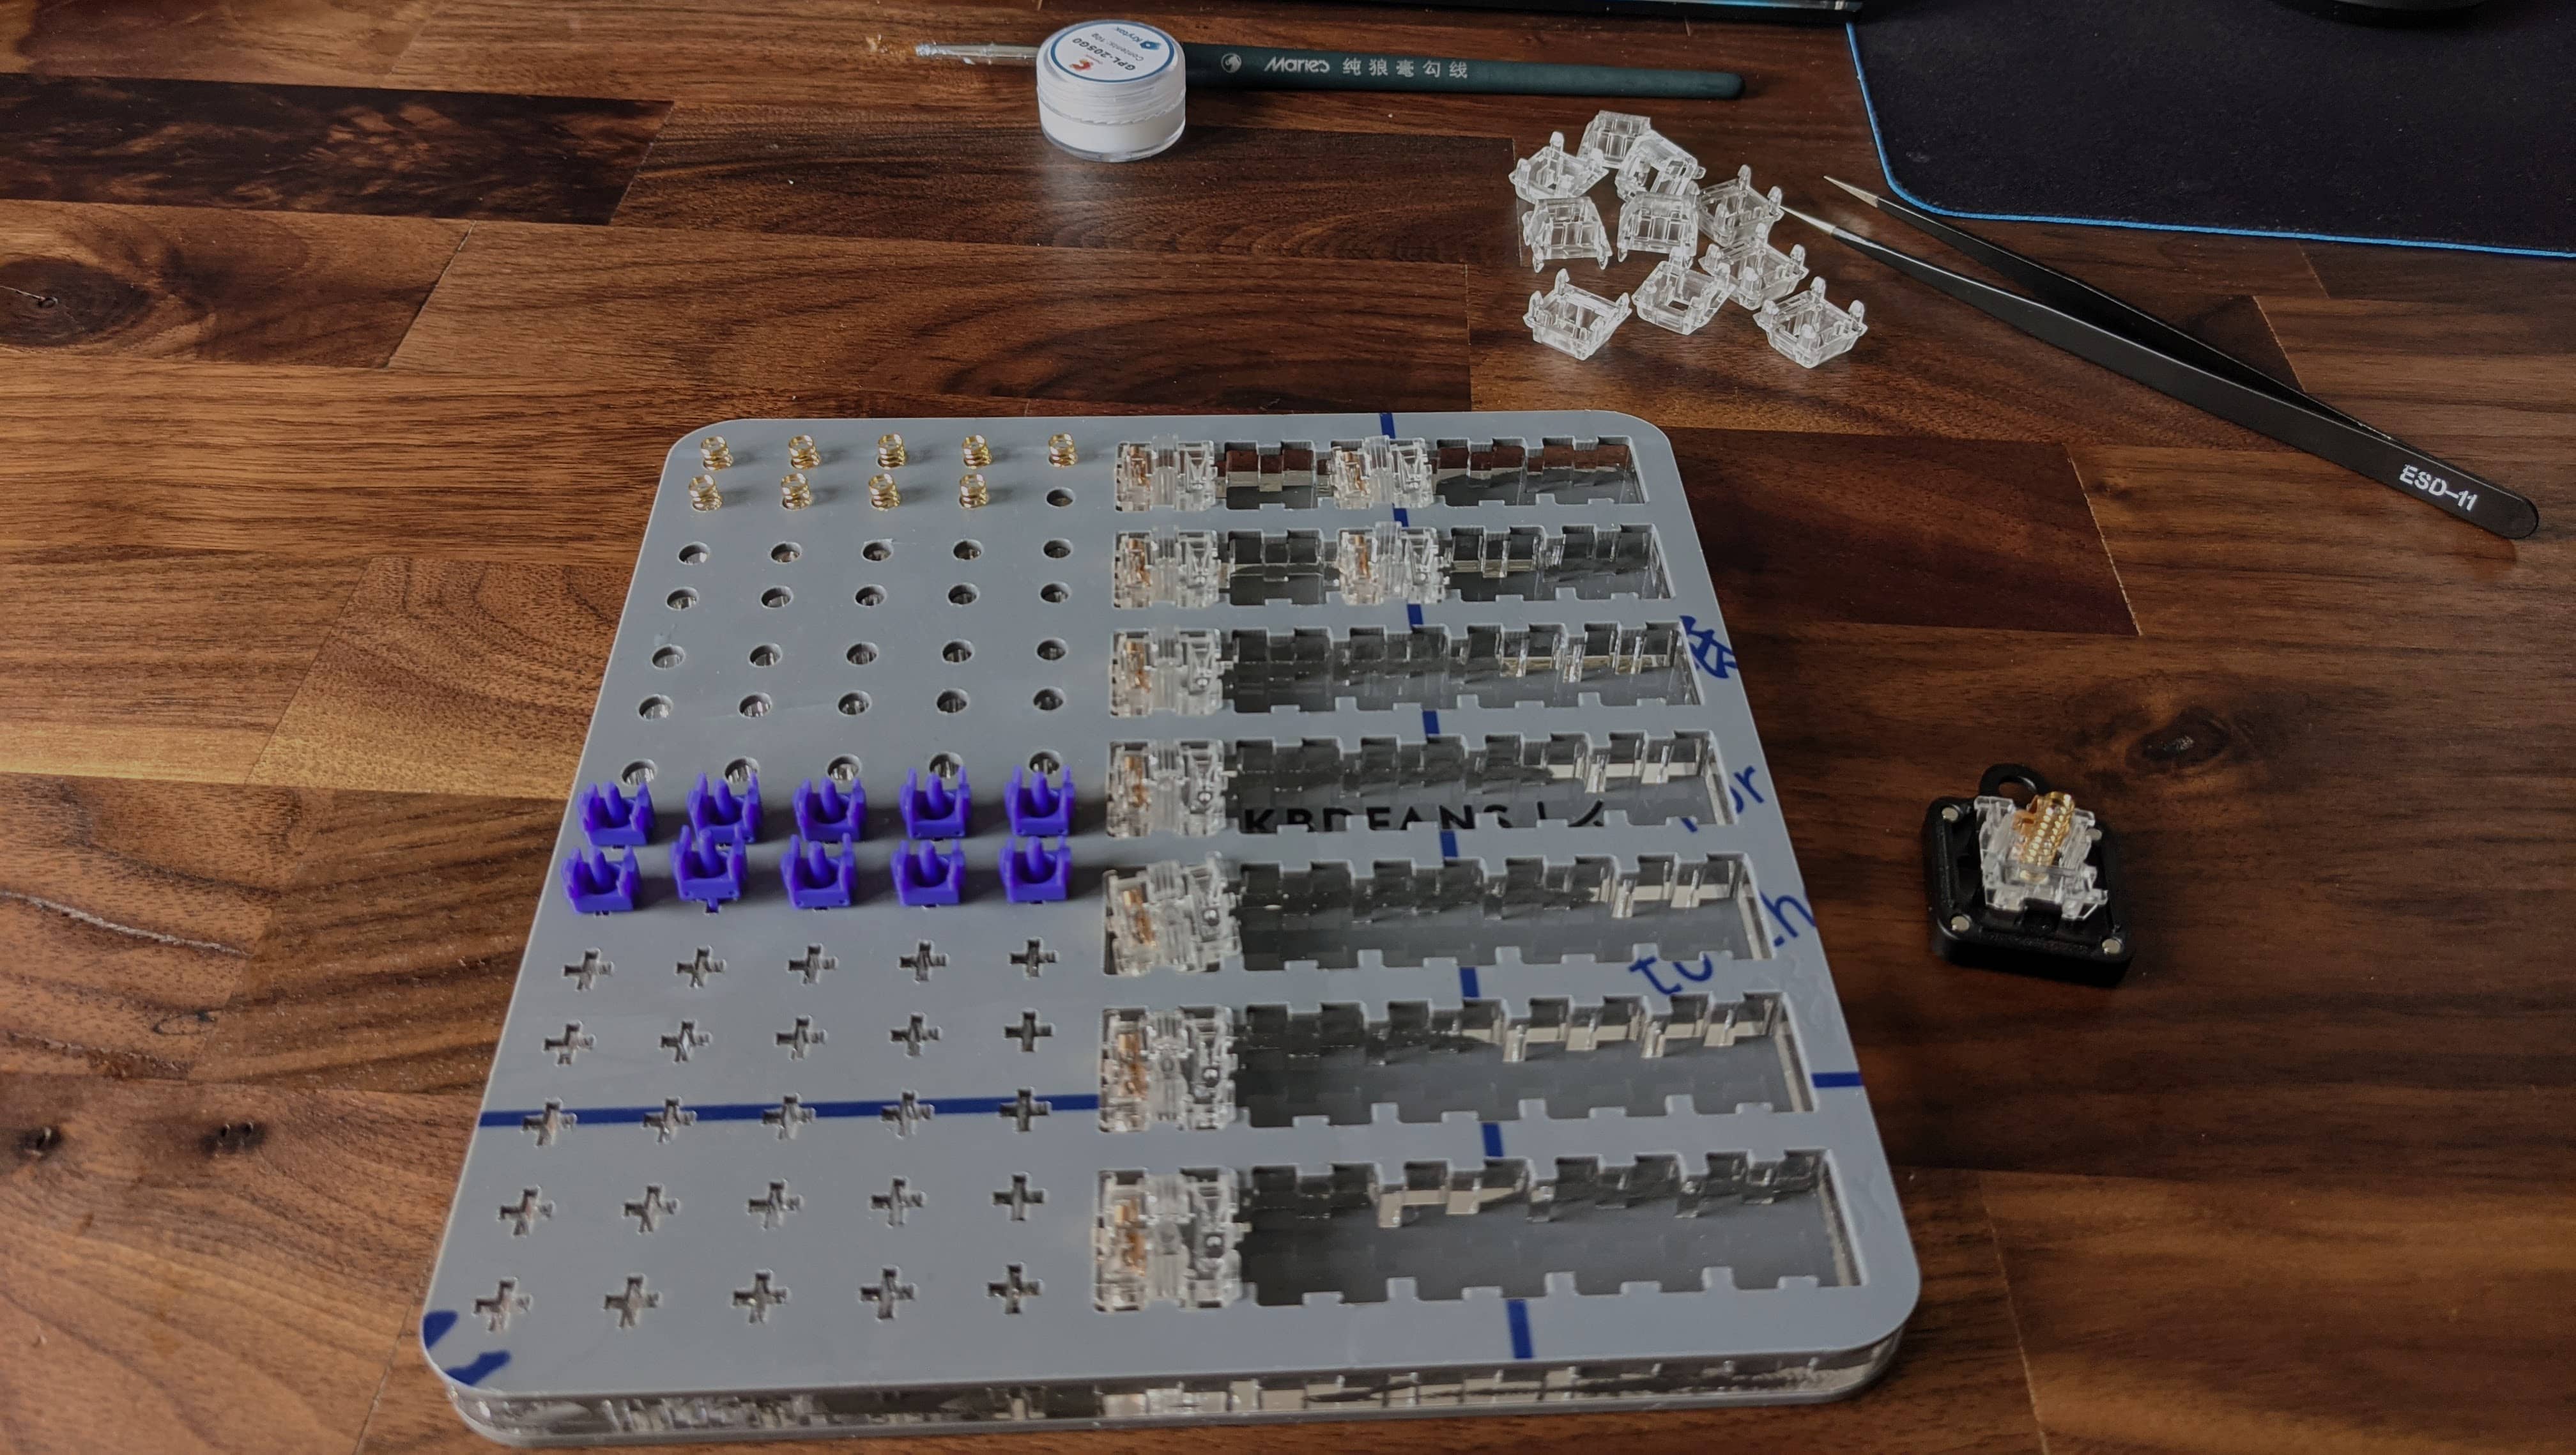
A common thing done with switches is lubing them. Lubing will lead to less scratching and a smoother typing experience. We’ll get into that later how it works, but you’ll need some brushes and a lube, most common would be Krytox 205G0.
Another mod you can do is film switches. Which means placing a little bit of material between the top and bottom housing of the switch. This will lead to a different sound and feel aswell. Since films are cheap, I bought some switch films aswell.
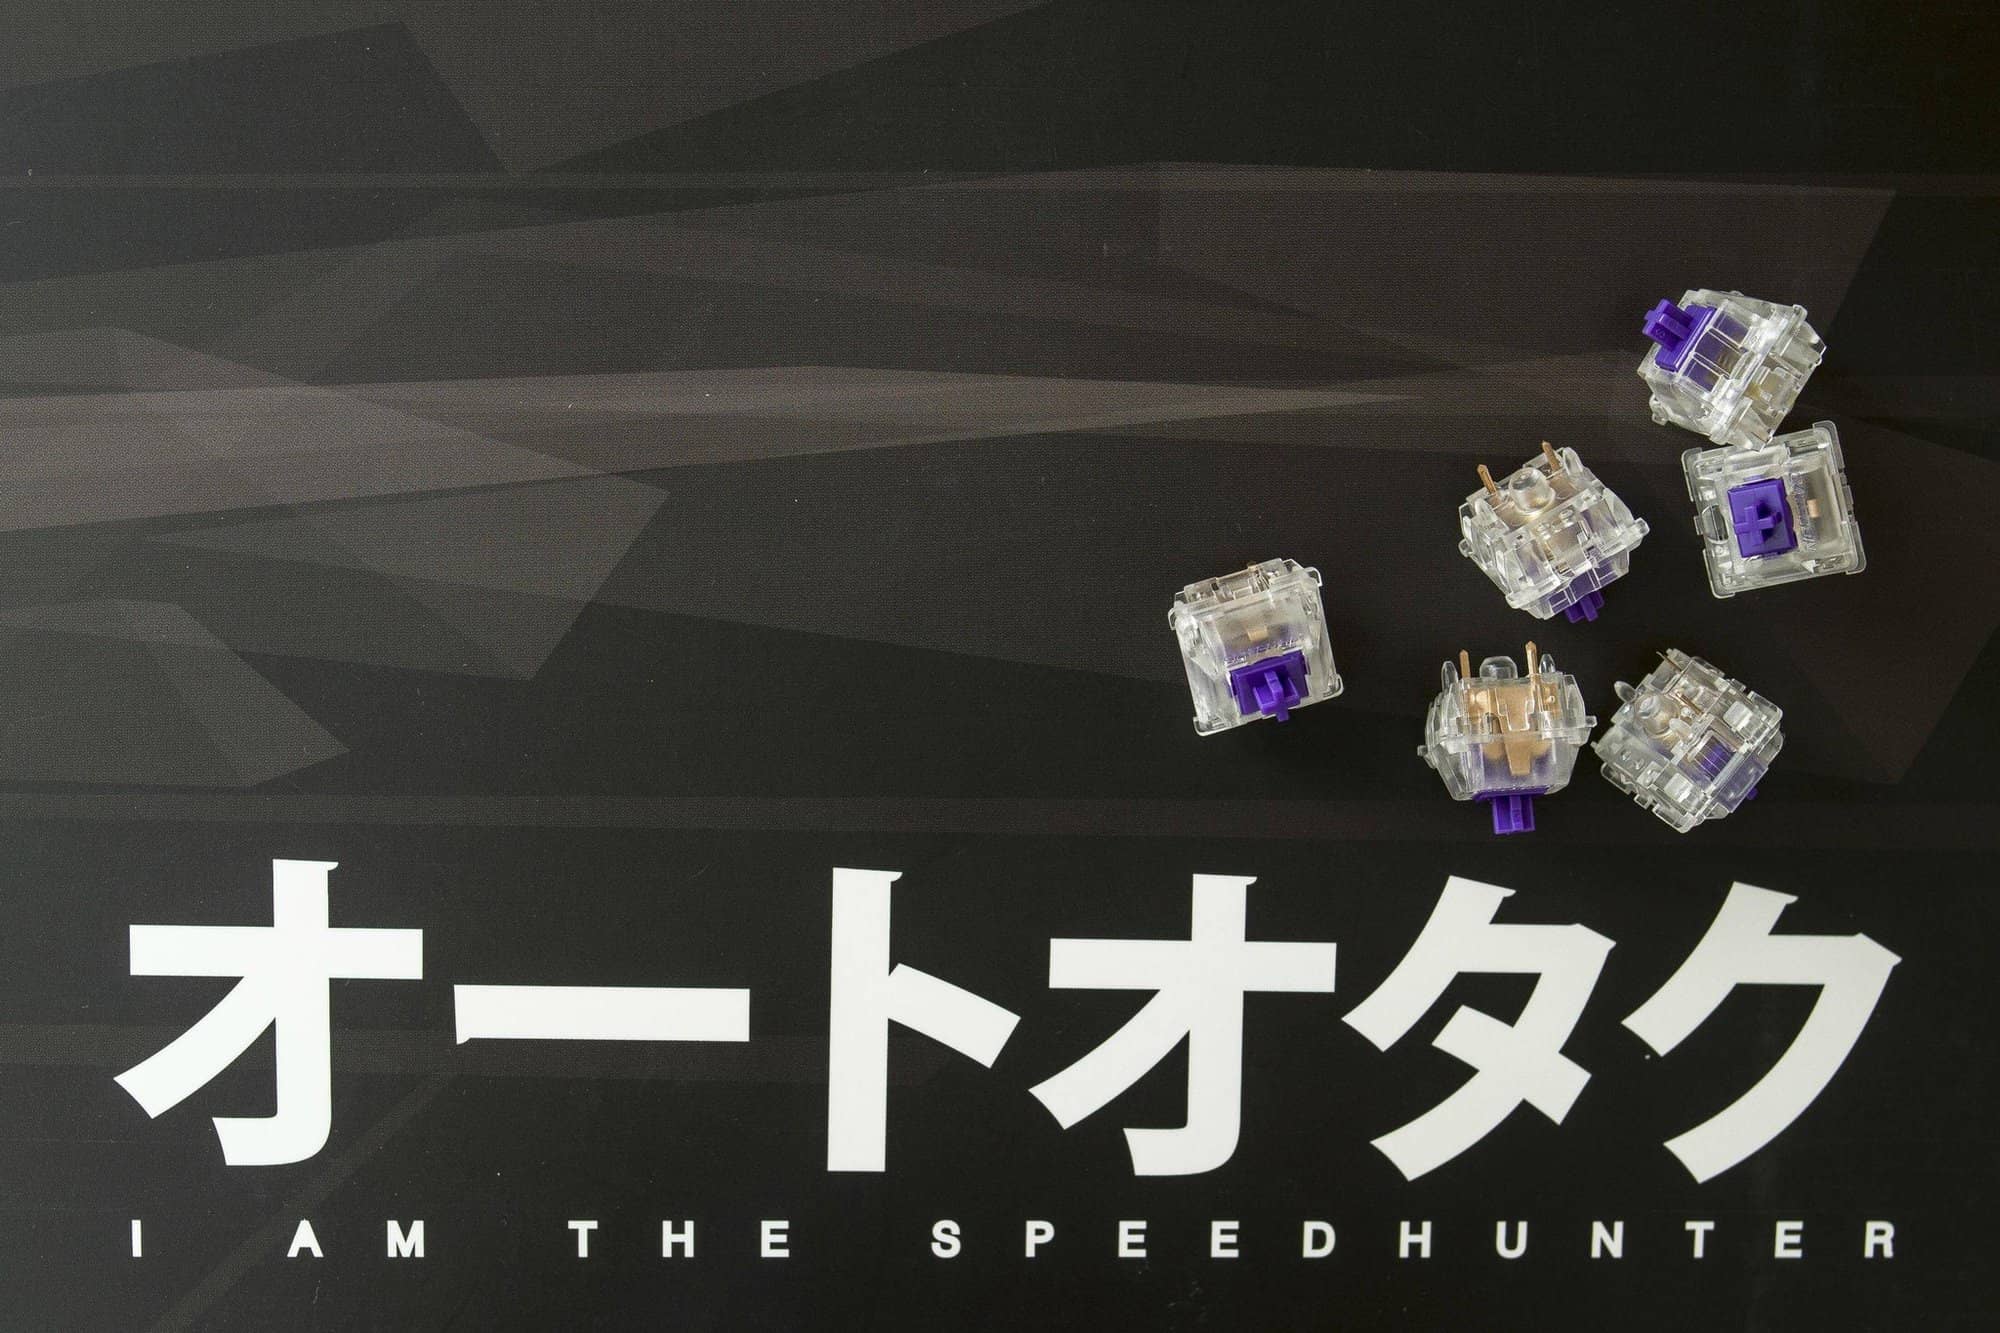
Image credit: zealpc.net
Keycaps
The last thing you need is keycaps. If you don’t know where to start here because they selection is gigantic I recommend these KBDFans keycaps they are simple, feel good and look great on any board. Most common for keycaps is the cherry profile (the shape of the keycap), which likely your keyboards before have all had. There are other profiles such as DSA which are all shaped the same, some like that. Another factor to consider is the material they are made out of. PBT and ABS are the two most common choices here, PBT generally is the more high quality option, colors are less pronounced but the plastic feels better in my opinion. ABS is usally the cheap option, budget keyboards like the keychron series all come with ABS keycaps.
ABS doesn’t have to be cheap though, GMK makes ABS keycaps sets which are mostly regarded as the most high quality keycap sets out there, and that’s why they are also the most expensive. I recommend not directly jumping to GMK, they are broadly available anyway only in group buys or in the second hand market.
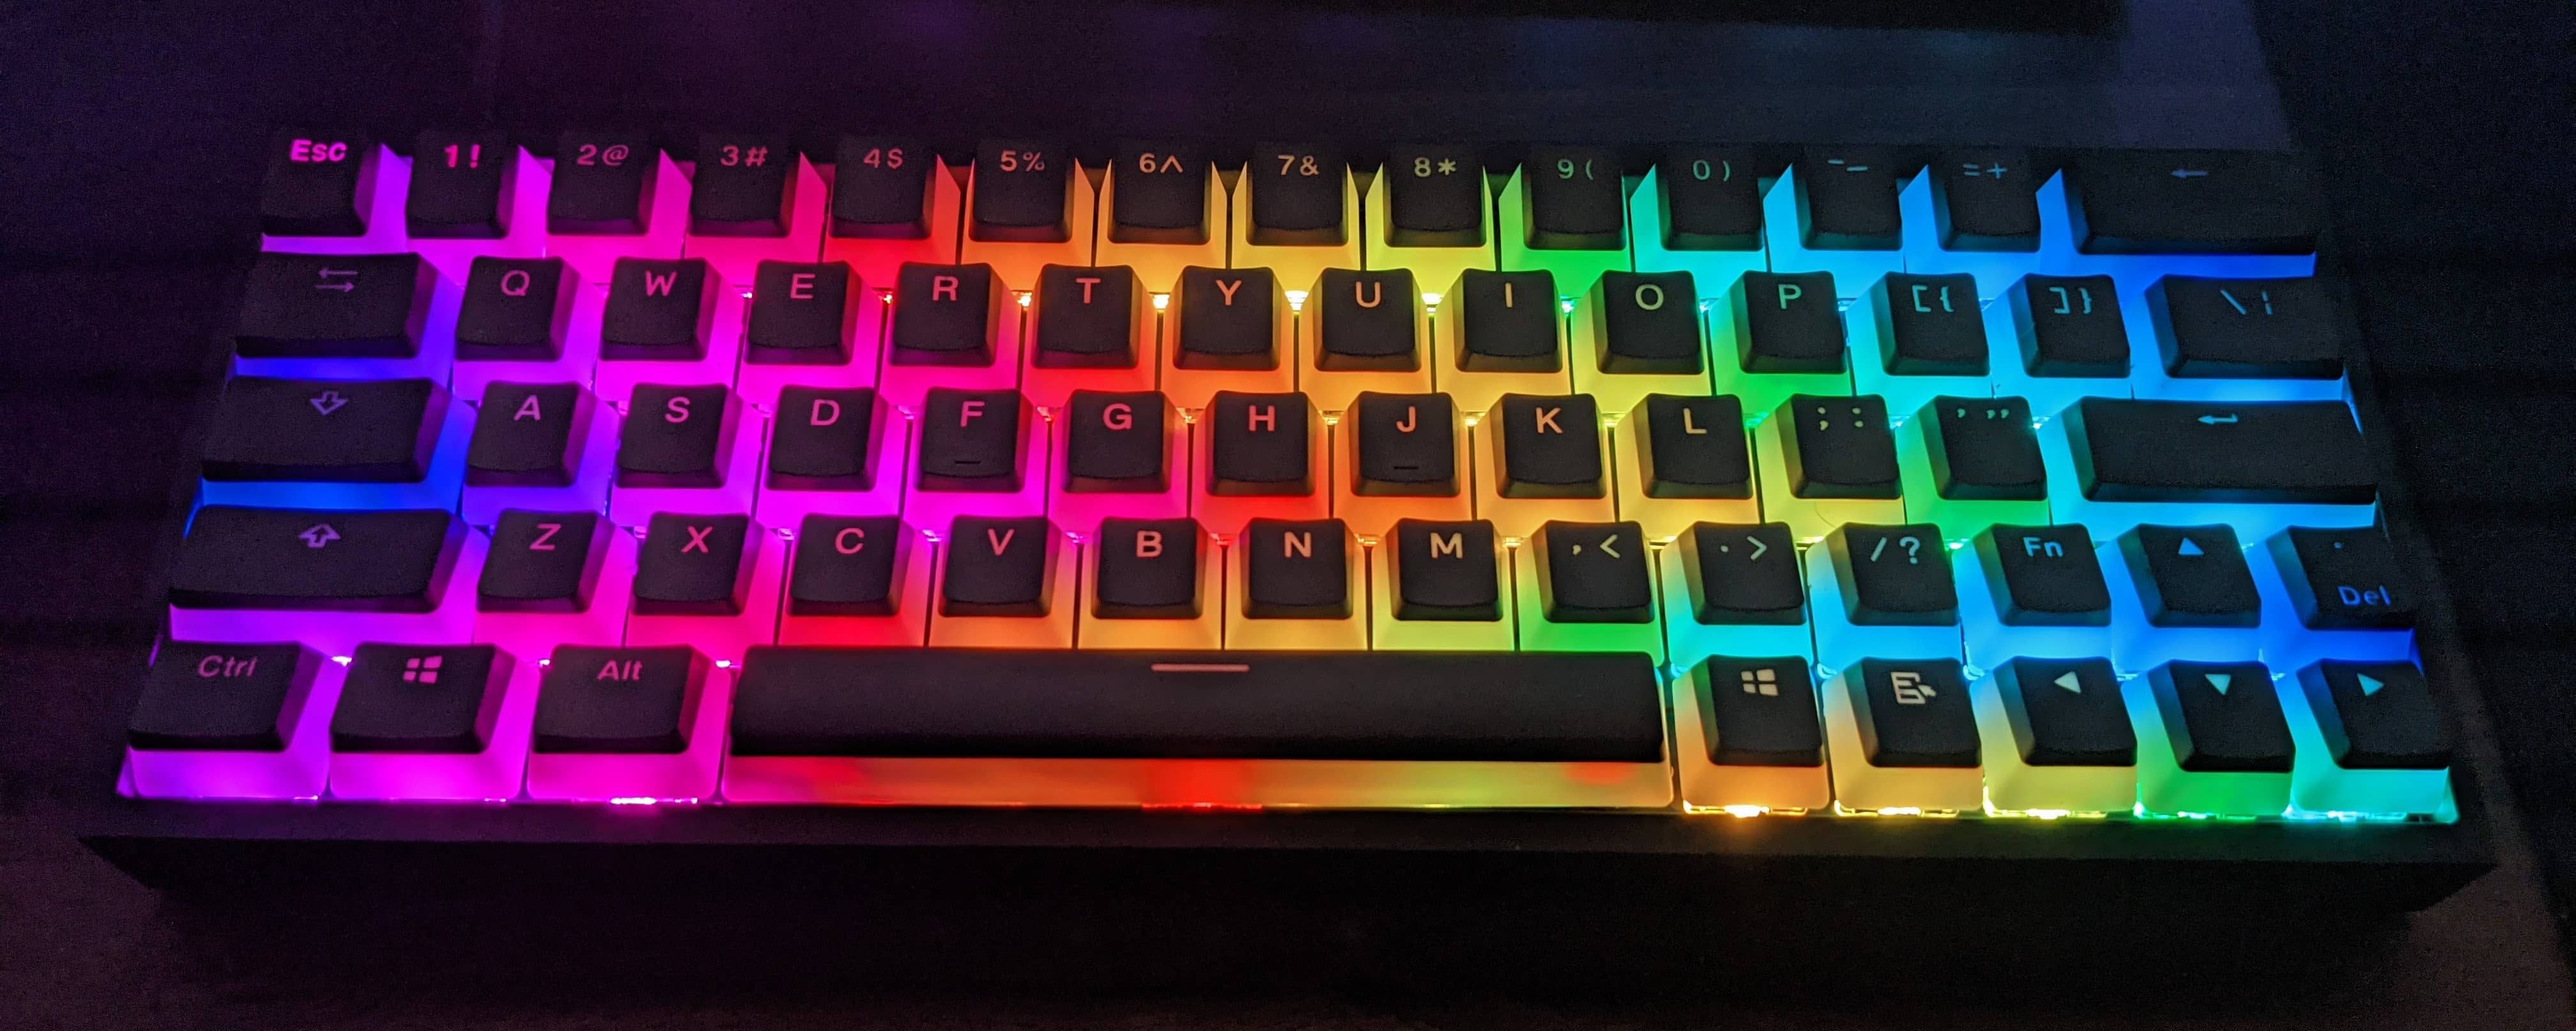
There are more factors to consider but the last one I want to talk about is shine through. Most custom keyboards don’t use keycaps with shine through legends meaning you can’t see your RGB through the keycap to read the letter for example. There are some exceptions, but most high end sets don’t have that option. For my build I really wanted to try going overkill with the RGB so I bought some pudding keycaps. Those have shine through legends and even the sides are shine through.
Make sure to get enough keycaps to fit your board with, you won’t always get the right legend for the key they are on (for example my right shift is just a menu key), especially considering the Cherry Profile keycaps have different heights and profiles depending on the row they are on. Commonly referred to as R1-R4.
Building
When building your keyboard start with the PCB and the stabilizers. There are a bunch of mods you could do, just to mention them so you can check out if they are worth it to you.
- Stabilizer clipping
- Lubing
- Band-aid mod
After you have mounted the stabilizers you can start mounting the PCB in the case, in my case I just screw it in. The mounting mechanism is very dependend on the case, the more expensive cases might have gasket mounts for a nice typing experience.
If you have chosen to mod your switches this would be the time to do so.
Taeha makes a great video how to lube mx-style switches.
https://www.youtube.com/watch?v=44Wv4OGdmu4
I went ahead and lubed and filmed my 80 switches, this can take quite some time to make sure to have some video or stream to entertain you meanwhile.
After you are done you can start putting in your keyswitches. This process will vary based on the parts chosen. Stick the keycap into the plate and then carefully bring the plate above PCB and push it in. I put in the outter switches on the corners and something in the middle to make the plate sit evenly above the PCB.
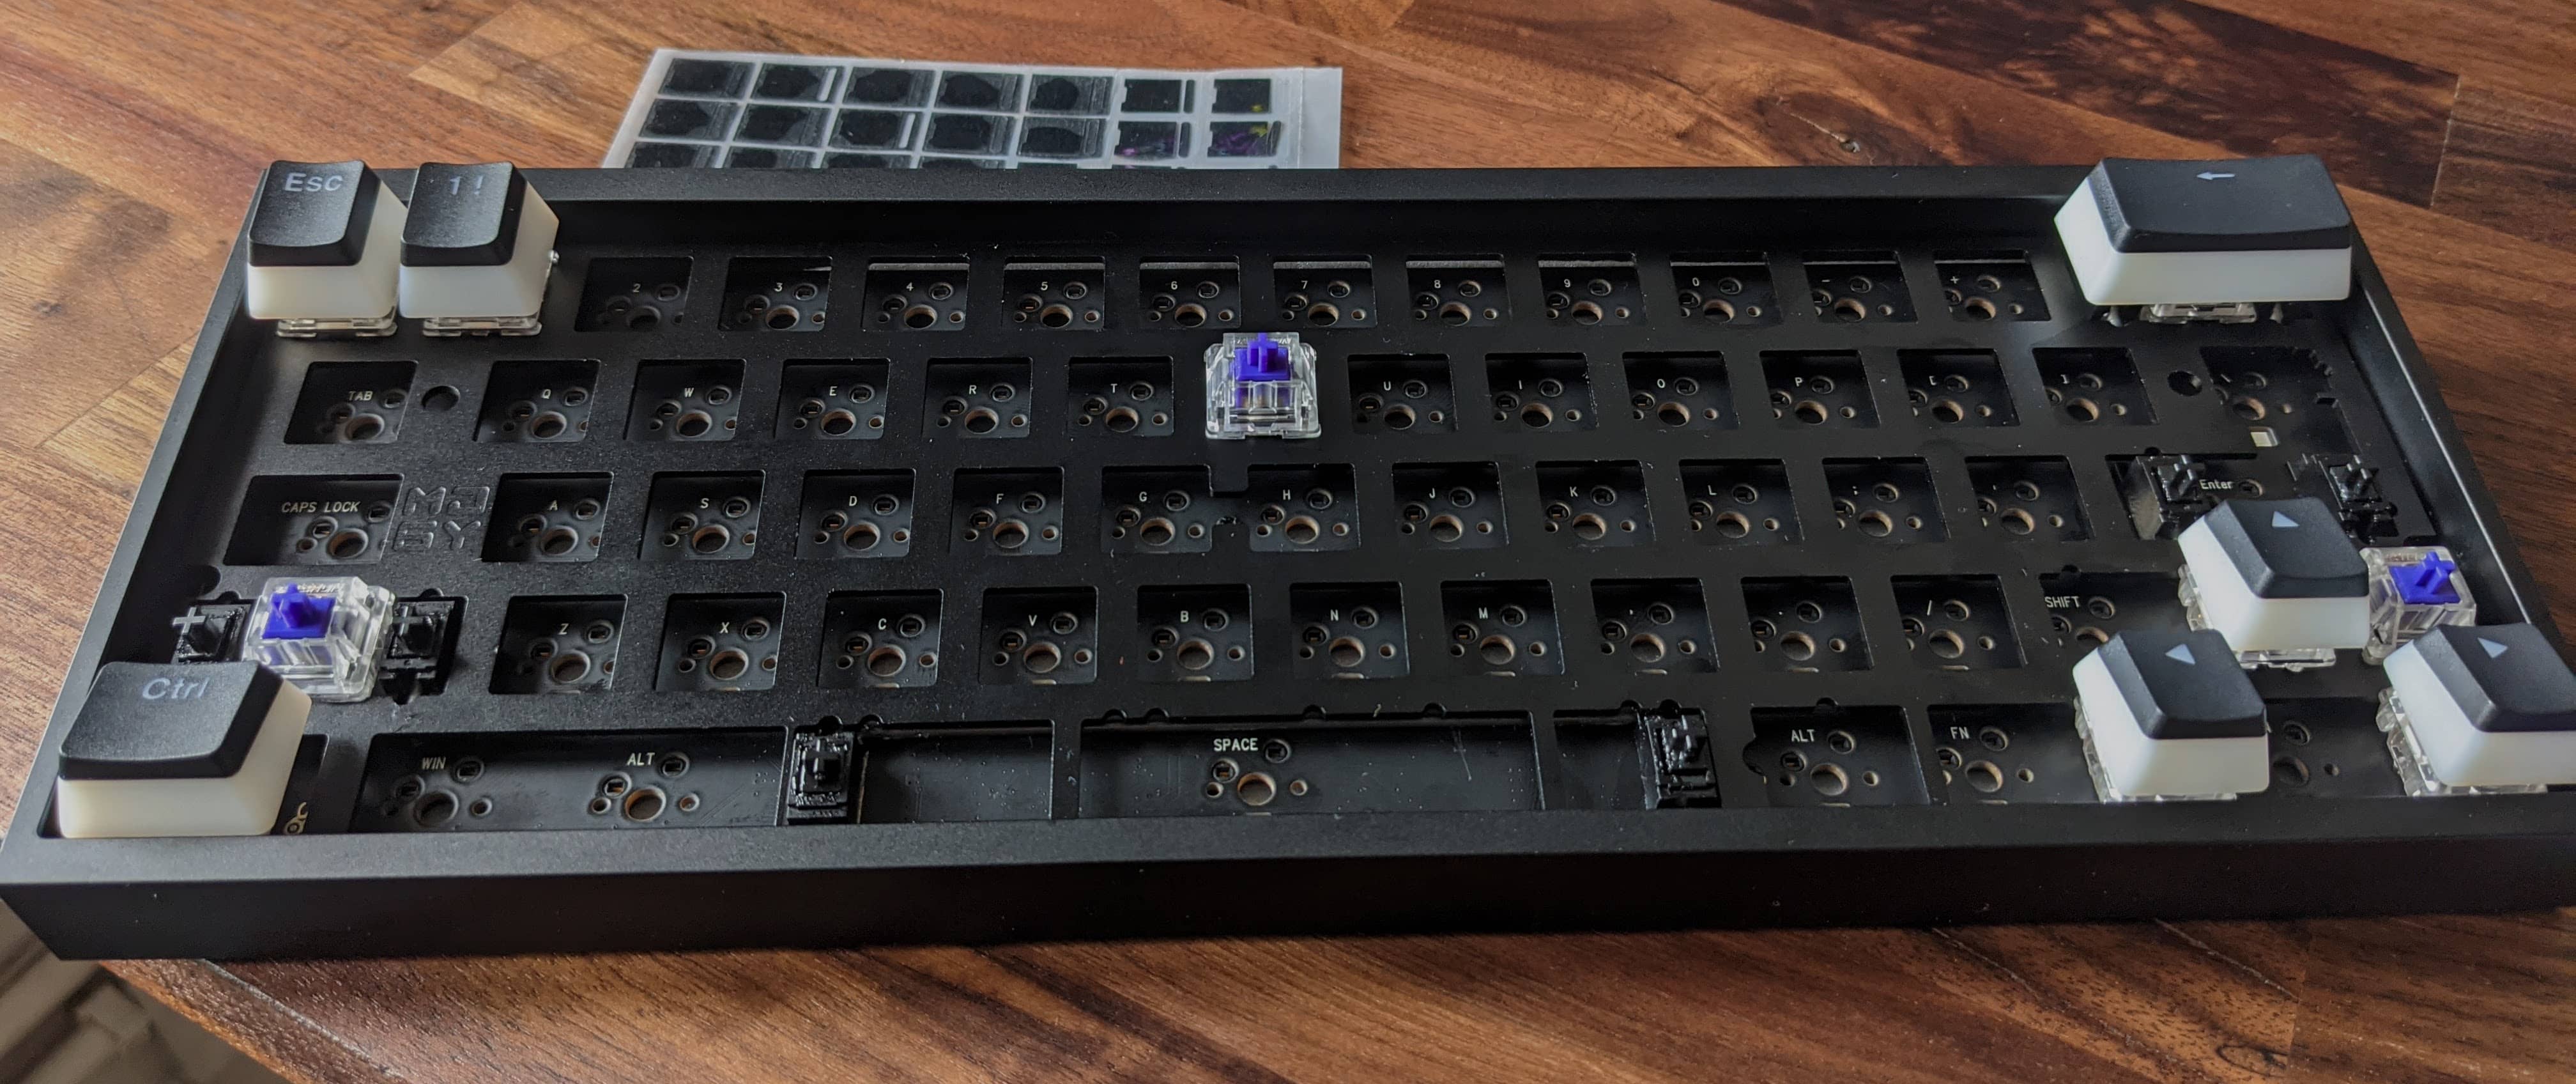
I already put on some keycaps because I wanted to check out how the rgb would look with the keycaps. It’s not a bad idea to fit some keycaps on it already to see if your layout will work out or if you have made a mistake somewhere.
After you have finished putting in all the switches, put on all keycaps and plug it in.
Firmware
Most PCBs will feature their RGB in full brightness and will have some sort default layout. To make the most out of our keyboard we’ll use QMK
If you are lucky enough that your boards supports VIA then download the firmware for your PCB from their website and flash it with the QMK Toolbox. To flash something you need to put the board into bootloader mode. Make sure to assign a RESET key in your keymap so you can make this process easier in the future, mine is on Layer 1 Backspace.
Read this QMK Guide on to do that. When you have flashed the firmware you can just download VIA from the VIA website and play around with your layout. The RGB can either be controlled through VIA or you can assign them to buttons on your keyboard. Make sure to play around with layers because that will increase the functionality of your keyboard tenfold.
If you don’t have the luxury of using VIA you can still use a graphical UI the QMK Configurator. It’s not as fancy or instant as VIA, but does the job. You’ll have to compile each time after you are done and then flash the file you download when clicking Firmware.
You can also just build the firmware on your own system and go down to building your layout in a C file if you want to build something really custom.
To give you some inspiration, here are my keymap files for all my keyboards: github.com/gempir/keymap
Below is the layout I chose for my newly build keyboard, configured with the QMK Configurator.
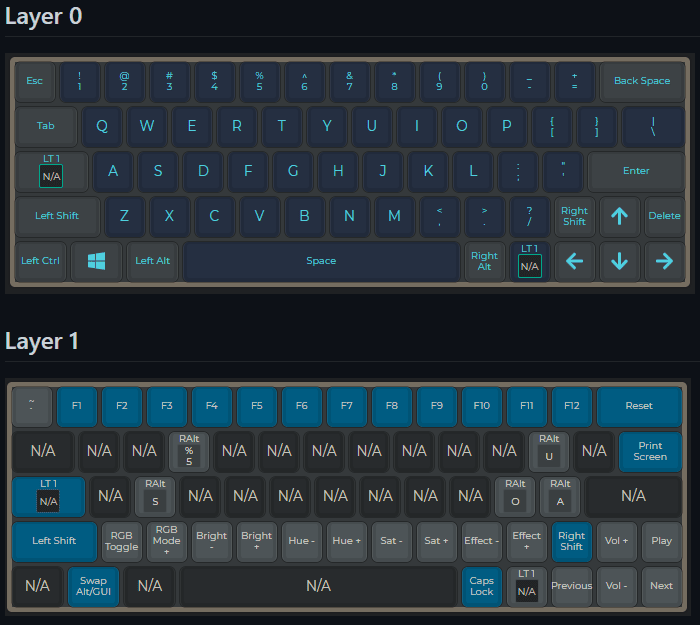
I use a special keyboard layout in my OS called EurKey which allows me to type special characters such as ößüä€ while keeping the comfort of an US layout.
Conclusion
If you like to fiddle with things and like building stuff this is a great hobby. This won’t make you 200% more productive or anything but it just gives me a bit of joy working on it or working with my keyboard and for me that’s worth it. Customizing everything to your liking is something I also very much enjoy and this hobby can satisfy. You don’t have to go for the most expensive build. Some Builds can be below $100, if you have some patience with AliExpress and settle on more plastic parts.
If you have any questions feel free to write a comment or reach out to me on Twitter